Crafting User-Friendly Laravel Command
Design your console commands for better user experience

To create a new command, we can use the make:command Artisan command. This command will create a new command class in the app/Console/Commands directory.
php artisan make:command DataCleaner
Let’s take a look at the example command to clean data on a website.
class DataCleaner extends Command{
	protected $signature = 'data:clean { — all} {website}';
    protected $description = 'Clean Website Data';

    public function __construct()   {
    	parent::__construct();
    }

    public function handle(
   	  WebsiteRepository $websiteRepository,
      CleanerService $cleanerService
    ){
    	$website = $this->argument(‘website’);
        $all = $this->option(‘all’);
        if ( $website ) {
        	$websiteRepository->filterByFqdn($website);
        }

         $websites = $websiteRepository->all();
         $website->each(function ($site){
         	$cleanerService->run($site->toArray());
            }
         );
     }
}
Note that we are able to inject any dependencies we need into the command’s handle method. We injected
WebsiteRepositoryandCleanerServiceclass in the handle method above.
Command Structure
The signature and description properties of the class will be used when displaying your command on the list screen.
protected $signature = ‘data:clean { — all} {website}’;
The signature property allows you to define the name, arguments, and options for the command in a single, expressive, route-like syntax.
All user-supplied arguments and options are wrapped in curly braces. In the following example, the command defines one required argument: website.
You may also make arguments optional and define default values for arguments:
data:clean {website?} // Optional argument…

data:clean {website?=sandipshrestha.com.np} // Optional argument with default value…
Options are prefixed by two hyphens ( — ) when they are specified on the command line. There are two types of options: those that receive a value and those that don’t. Options that don’t receive a value serve as a boolean “switch”. In the following example, the command defines one option: all.
The handle method will be called when your command is executed. We place our command logic in this method.
Retrieving Input
We can access the values for the arguments and options accepted by our command by using the argument and option methods:
// retrieve the website argument value...
$website = $this->argument(‘website’);

// retrieve all of the arguments as an array...
$arguments = $this->arguments();

// Retrieve a specific option...
$all = $this->option('all');

// Retrieve all options...
$options = $this->options();
We can also ask the input value from users by using the following methods.
// prompt the user with a question
$name = $this->ask('What the domain name of the website?');

// similar to ask, but the user's input will be hidden as they type
$password = $this->secret('What is the admin password?');

// asking For Confirmation
$this->confirm('Are you sure? All data will be deleted.')

// used to provide auto-completion for possible choices
$website = $this->anticipate(
	'What the domain name of the website?',
	['google.com', 'facebook.com']
);

// give the user a predefined set of choices
$website = $this->choice(
	'What the domain name of the website?',
	['facebook.com', 'google.com', 'linked.in'],
    $defaultIndex
 );
Writing Output
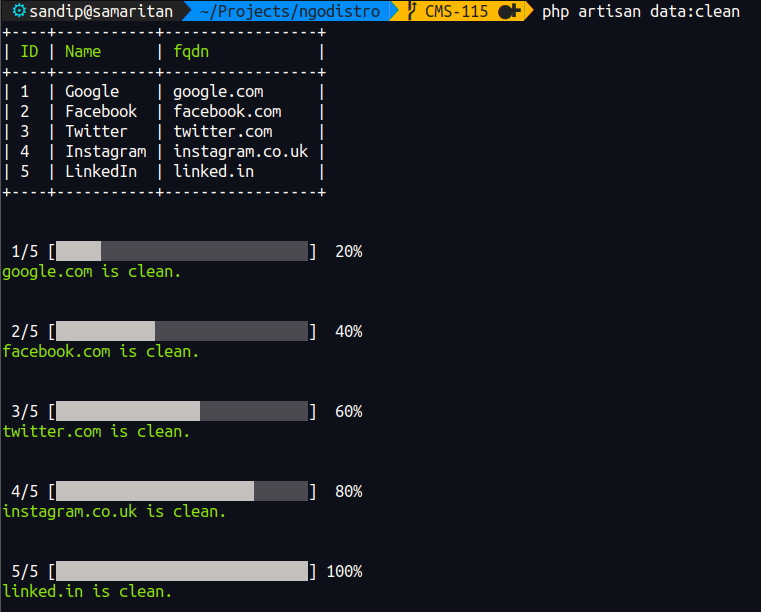
To send output to our console as feedback, we can use the line, info, comment, question, warn, and error methods. Each of these methods will display the output text in appropriate colors for their purpose. Expect these text output method, we are also provided with two very useful and appealing layouts Table and Progress Bar.
Table Layouts
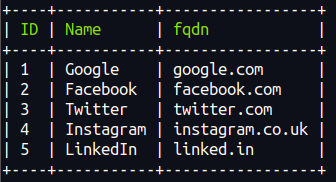
The table method makes it easy to show tabular data. We just need to pass in the headers and rows to the method. The width and height will be dynamically calculated based on the given data:
$this->table(['ID', 'name', 'fqdn'], $websites->toArray());
Progress Bars
For iterative or long-running tasks, we could show a progress indicator as feedback to the user. Using the output object, we can start, advance and stop the Progress Bar. First, define the total number of steps the process will iterate through. Then, advance the Progress Bar using $bar->advance(); after processing each item:
$bar = $this->output->createProgressBar(count($websites));

Output
The final code looks like below:
class DataCleaner extends Command{
	protected $signature = ‘data:clean { — all} {website}’;
    protected $description = ‘Clean Website Data’;

    public function __construct() {
    	parent::__construct();
    }

    public function handle(
    	WebsiteRepository $websiteRepository,
        CleanerService $cleanService
     ){
     	$website = $this->argument(‘website’);
        $all = $this->option(‘all’);
        if ( $website ) {
        	$websiteRepository->filterByFqdn($website);
        }
        $websites = $websiteRepository->all();

        $this->table(
        	['ID', 'name', 'fqdn'],
            $websites->toArray()
		);
		$bar = $this->output->createProgressBar(count($websites));

        $website->each(function ($site){
        	$cleanService->run($site->toArray());
            $this->info("\n".$site->fqdn.' is clean.');
            $bar->advance();
		});
    }
}
These small changes in the interface do actually matter and help make the experience more appealing and intuitive to the user. Now, go and write a beautiful command 😃.
Great things are not done by impulse, but by a series of small things brought together.
— George Elliot